Multicloud Kubernetes Deployments with Upbound Cloud


November 18, 2020
Jared Watts
Reading time: 6 min read
Share:
Today we're releasing a new multicloud Kubernetes Crossplane configuration to the Upbound Registry. Using this Configuration, SREs, and the application teams they support, can easily deploy Kubernetes clusters into multiple cloud environments. Upbound Cloud enables this through a single API or console interface so teams no longer have to duplicate time consuming setup or maintain multiple Infrastructure-as-Code scripts.
Read more below about how customers are deploying Kubernetes across clouds, and a short tutorial showing you how to use this configuration in Upbound Cloud today.
Background
A key promise of Kubernetes is having a common application runtime across infrastructure environments, making the goal of workload portability a reality. While this sounds simple, truth be told, things are typically more complicated. Thankfully, Upbound Cloud helps you manage cluster configuration in a way that's cloud agnostic and lets application developers safely provision clusters on their own without needing to become infrastructure experts.
Despite the rise in popularity of Kubernetes managed services like EKS or GKE, deploying and managing Kubernetes clusters across those environments has become an increasingly challenging problem. Infrastructure operators need to define and manage configuration for multiple environments, repeating work for every cloud each time a setting or policy changes.
Additionally, during development and prototyping, application teams typically need the ability to quickly provision new Kubernetes environments on their own. Without a quick and safe way of doing this, operators get bogged down in tickets and emails from developers requesting new resources.
Thankfully Upbound Cloud can enable quick, safe, and cloud agnostic Kubernetes cluster deployment in just a few minutes right out of the box.
Requirements
To get started, first create an account on Upbound Cloud. While you're at it, go ahead and create a free Organization.
Next, clone this example repository. We'll be referencing some files and code found in the example directory, so it will be easier to follow along if you have a copy.
Finally, install the Crossplane CLI to make it easier to configure your Crossplane instance we'll create in Upbound Cloud.
Getting Started
Inside the repository you just downloaded, you'll find several directories containing YAML for Crossplane compositions. This YAML gets packaged up into what we call a configuration and installed into a Crossplane cluster which uses it to provide a custom API to the composite resources defined. The easiest way to this of this is that configurations act like a "blueprint" for your cloud API.
The cluster and network directories each contain their own composition, and can all be thought of as separate API endpoints defined by this configuration.
What's interesting is when you look into each, you can how we've defined configuration for both GCP and AWS infrastructure. Here's the anatomy of the cluster API. There's a composition defining GKE cluster setup, another for EKS setup, and finally a services directory which leverages provider-helm to install on-cluster services into both clouds.
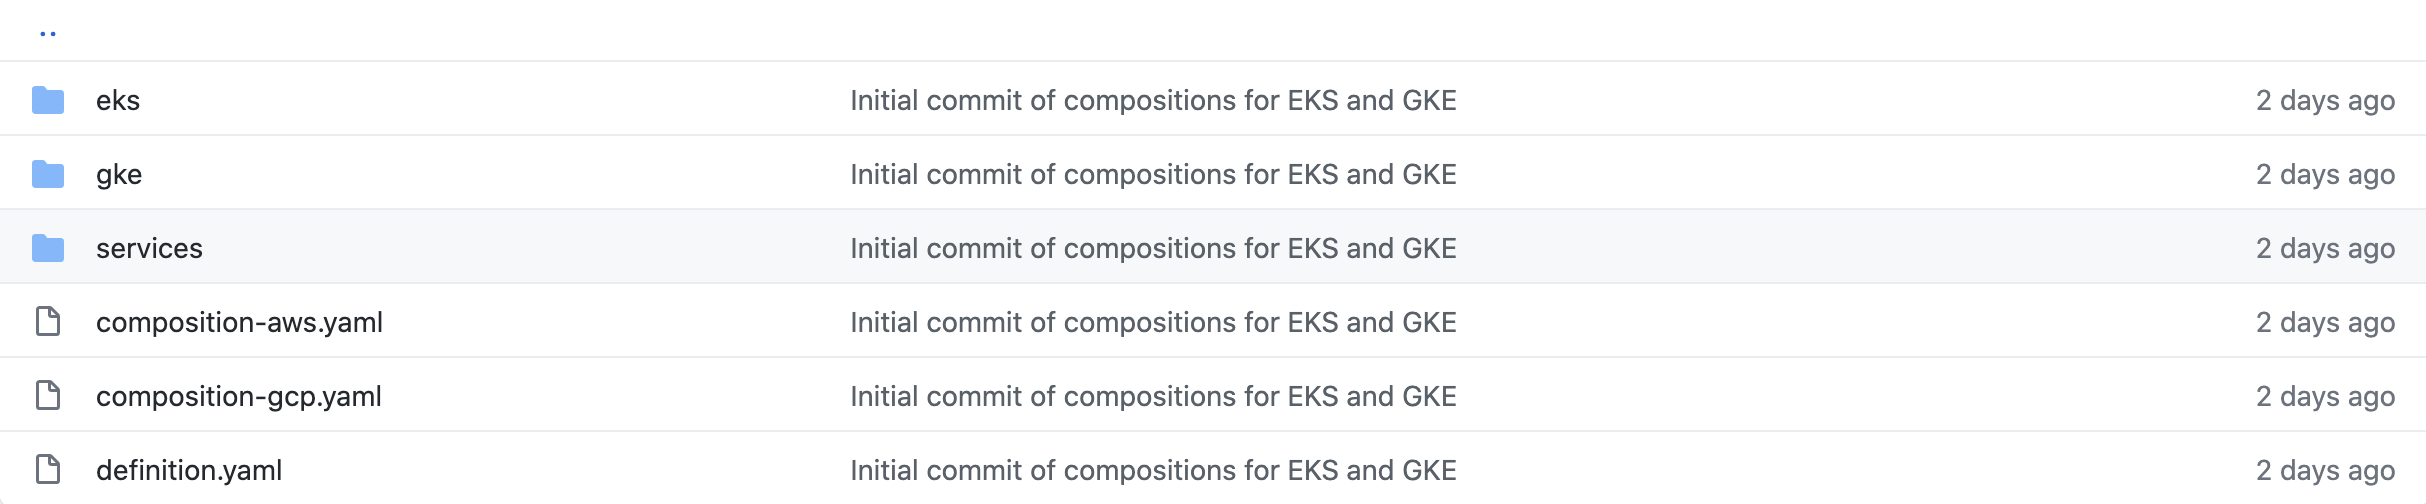
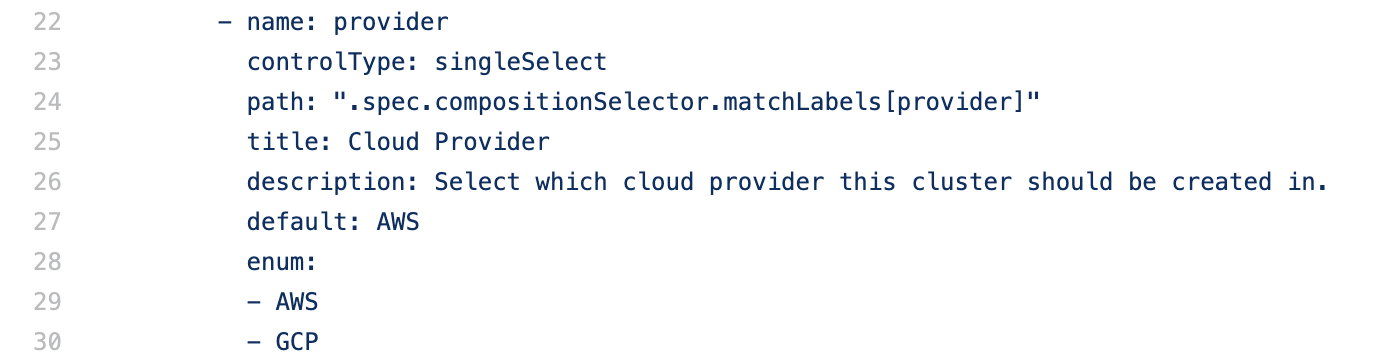
In the definition.yaml file, which renders a dynamic UI inside of Upbound Cloud which you'll see later on in this post, we've gone ahead and hidden this complexity behind a simple dropdown for users to choose which cloud they want their composite cluster resource to run inside.
To save some time later on in this tutorial, we've uploaded this configuration to the Upbound Registry where you can install it into a platform using the rest of this guide.
Multicloud Cluster Deployment
Create a New Platform
First, you'll need to create a new Platform in Upbound Cloud. This is just a hosted Crossplane cluster we run and manage on your behalf.

Connect to Your Platform's Crossplane
UI install is coming soon, but today, CLI access to the hosted Crossplane cluster powering your Platform is required to install the Configuration from your Repository
To get started, we need to create a user token which will allow you to connect and authenticate to Upbound Cloud via kubectl.
Afterwards, go back to the Console, select your Platform, click "Connect via CLI" on the bottom left of the screen. Follow those instructions using your newly created Access Token:

Once connected, we'll need to install the provider-aws, provider-gcp and provider-helm your configuration requires. Automatic dependency resolution is coming later this year.
kubectl crossplane install provider registry.upbound.io/crossplane/provider-helm:v0.3.7
kubectl crossplane install provider registry.upbound.io/crossplane/provider-aws:v0.14.0
kubectl crossplane install provider registry.upbound.io/crossplane/provider-gcp:v0.13.0
Use your AWS account credentials to authenticate provider-aws by downloading a AWS token locally into a file and using that to configure the provider:
AWS_PROFILE=default && echo -e "[default]\naws_access_key_id = $(aws configure get aws_access_key_id --profile $AWS_PROFILE)\naws_secret_access_key = $(aws configure get aws_secret_access_key --profile $AWS_PROFILE)" > creds.conf
kubectl create secret generic aws-creds -n crossplane-system --from-file=key=./creds.conf
kubectl apply -f examples/aws-default-provider.yaml
Next we'll need to configure your GCP provider by storing your GCP credentials into a secret it can read.
Set up your GCP account keyfile by following the instructions on https://crossplane.io/docs/v0.14/getting-started/install-configure.html#select-provider
Ensure that the following roles are added to your service account:
- roles/compute.networkAdmin
- roles/container.admin
- roles/iam.serviceAccountUser
Create the ProviderConfig, ensuring to set the projectID to your specific GCP project:
kubectl apply -f examples/provider-default-gcp.yaml
Finally, we're ready to install the configuration whose repository you just downloaded.
kubectl crossplane install configuration registry.upbound.io/upbound/platform-ref-multi-k8s:v0.0.1
After the Configuration installs, you should see each Composition show up under the Global Resources view.
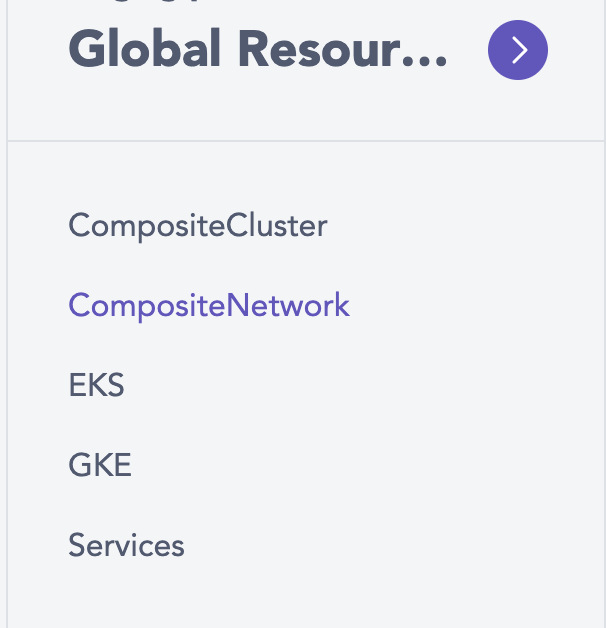
Once added, you'll create a network object for your desired cloud in order to spin up shared networking resources for your teams.

Finally, we'll go ahead and create a cluster which will use that composite network resource you just created.

So far, you've done everything inside of the Upbound Cloud Admin Console. However, if you go to your organization picker and select User Console, you'll be taken to the experience your developers get with Upbound Cloud.

Here developers see a paired down interface and are greeted to the cloud console dynamically generated from the configurations you've installed. It's tailor-fit to their needs and designed to make it easier for them to safely get the resources they need, whenever they need them.
Conclusion
That's it! You're now able to deploy Kubernetes clusters across cloud environments using a single source of truth for cluster configuration.
Upbound Cloud lets you define and manage the API for this composite cluster resource, and then give your developers self-service access to the API through their console.
If this was interesting to you, sign up for our Community Preview and try this out today, or reach out to learn more and we'll give you a live demo.
PS: Powering every Upbound Cloud account is the CNCF popular open source project, Crossplane. Crossplane is hosted on Github, and we have a thriving community on Slack and Twitter. Come join the fun!
Subscribe to the Upbound Newsletter